Water bath canning is the process used to preserve fruits, (including tomatoes – more on that later), jams, jellies, and pickles. These types of food generally contain high acid levels so the heat generated by boiling water (along with the acidity level of the food) is high enough to kill most of the nasty bugs that promote food spoilage.
Canning food can’t be rushed. Take your time, follow the instructions, and enjoy the journey in order to get the best results! There will be lots of water bubbling and food cooking and jars heating. The kitchen will get nice and toasty. If you are doing this in the heat of summer (because, of course, that is when everything gets ripe), keep plenty to drink nearby. Consider water bath canning in the early morning before the day gets hot! My favorite times to can jams are during the winter months. I often freeze fruit and berries and spend a rainy winter afternoon making jams as gifts for the holidays!
OK! – let’s get started…
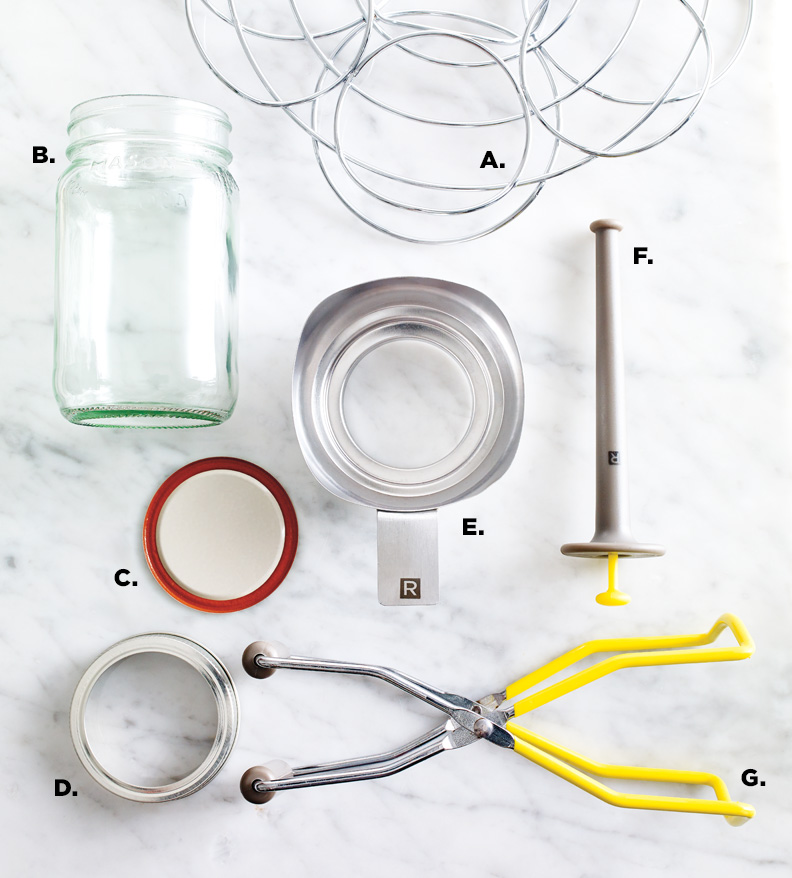
First, get all of your water bath canning supplies out and set them close at hand. Here’s what you’ll need:
- Jars, lids, screw bands (the size of the jars depend on whatever it is you are canning – check your recipe for suggested sizes)
- Water Bath Canning pot with lid
- Canning rack
- Small pot (to heat the lids)
- A bubble freer (this should be plastic or wood, like a chopstick, plastic knife or a spatula – so that jars don’t accidentally get scratched)
- A teakettle or other small pot full of hot water
- Several big spoons for stirring
- A big pot to cook the syrup, juice, water, or jam
- Clean cloths /paper towels – for wiping the rims of the jars and to sop up spills
- Clean towels or cake rack– to set the hot jars on. Note: you don’t want to set the hot jars on your cold granite countertop – thermal shock could occur and your jars or even your countertop could crack.
- Hot pads
- Canning funnel
- Ladle
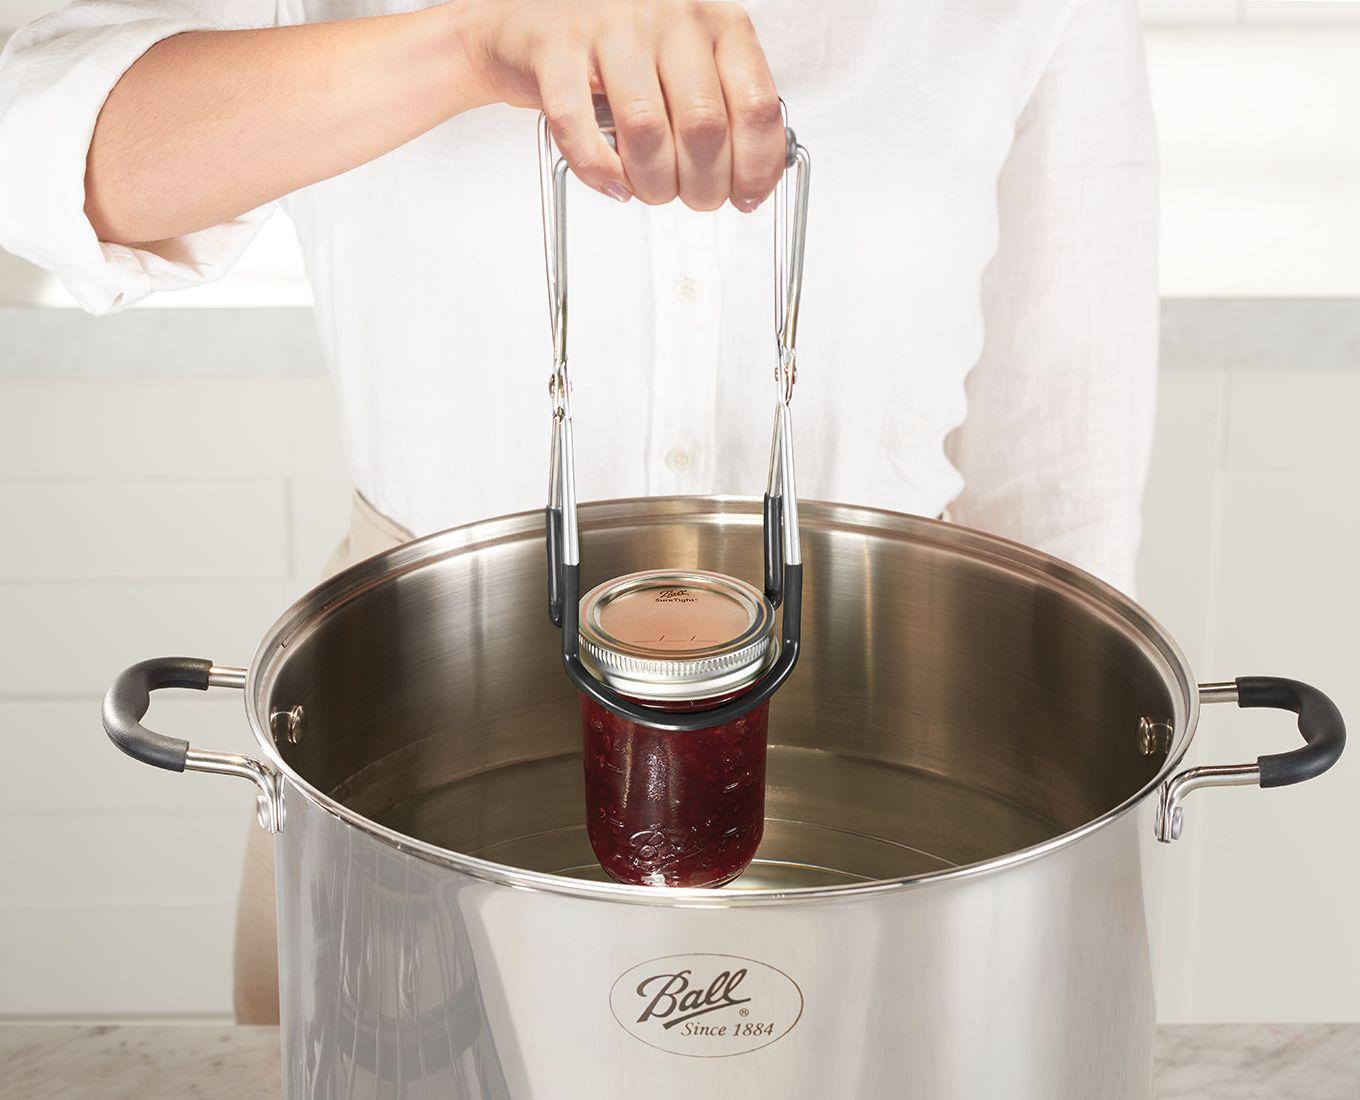
- Jar lifter
- Magnetic lid lifter, lid rack, or tongs
- Jar labels (a sharpie will do just fine if you don’t have any of these)
Gather your Jars
Choose the size as suggested by your recipe. Prepare a couple of extra jars in case you wind up with a little more fruit than your recipe describes. Check your jars carefully for any nicks, cracks, or rough edges. A good way to do this is to wet your finger and run it over the rim. Don’t use any jars that are damaged. The slightest nick will stop you from getting an airtight seal!
Clean and heat the jars
Wash and rinse them in soapy water and then fill them full of hot water until you need them. Better yet, run them through your dishwasher to clean and preheat. If you’ve got a heating cycle on your dishwasher, leave them in there to stay heated until you need them. I’ve also placed them in my oven at 150 degrees to stay warm until needed. Why do we do this? We want to keep the jars warm so that when we pour in the hot fruit or liquid,the jar won’t crack. A word about sterilizing jars. The food and the jars will be sterilized in the canning pot as part of the water bath canning process as long as the processing (boiling) time is greater than ten minutes. If your recipe calls for less than ten minutes of processing time, you will need to sterilize your jars by boiling them for ten minutes first.
Before we start preparing the fruit, fill the water bath canning pot half full of water (for pint jars – maybe 2/3rds full for quart jars). Center the pot on your stove burner and turn it on. Bottom line – we’re looking to cover the pint jars with at least three inches of water and the quart jars with at least two inches of water. Once you’ve been water bath canning regularly, you can eye-ball this pretty well. Just in case, have your teakettle (equipment list above) full of hot water handy. Once you put your jars in, if there isn’t enough water to cover, you can add it from the teakettle.
Prepare the lids.
ALWAYS USE NEW LIDS! (Canning lids cannot be reused.) It’s not worth going through all the trouble of preparing these luscious foods and then the jars won’t seal! Place the lids in a small pot of water and bring the water to a simmer. Then turn off the burner or keep on low so that the water stays hot. The rubber gaskets on the lid are softened so that they attach themselves to the glass when cooled. This is what causes the seal.
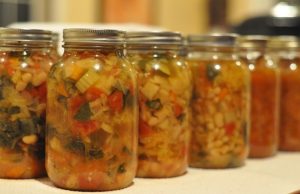
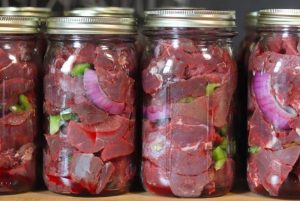
Prepare the fruit according to your recipe. If you are going to place raw fruits into the jars, clean the food well and sort it in uniform size and shape.
Fill the jars. Now this is where things get interesting……
Hot pack or raw pack the jars.
“Pack” refers to packing the fruit into the jars. Pack the food relatively densly but no higher than 1/2 inch below the lip of the jar. For packed fruit, cover the food with the hot liquid (juice, syrup, water) to cover the food. Pour to within 1/2 inch from the lip of the jar. This 1/2 inch gap is called headspace. The trick is to cover the food but still leave a little headspace in the jar. If you don’t completely cover the food, it tends to darken and, even though it is still perfectly good, it just doesn’t look as appetizing. If you’ve got one of these great canning funnels, the bottom section of the funnel is exactly 1/2 inch high. Also, using a funnel makes pouring the liquid into the jar much easier!
Before putting the lids on the jars, we’ll need to release any trapped bubbles. Take a bubble freer and poke it through the jar in a few places. There might be air bubbles trapped between the food pieces and if left unchecked, they can rise to the top during processing and leave too much headspace. This could cause the jars not to seal properly. After a few good pokes with the bubble freer, check to make sure that you still have 1/2 inch headspace. The hot liquid may have moved into air pockets when you shifted the food. Add more liquid as needed.
For jams and jellies, simply ladle the mixture into the hot jars. Remember to leave a headroom here, too. Use the canning funnel if you’ve got one – it is a whole lot easier to get the jam mixture into the jar without dripping it down the side. Jams and jellies don’t require quite as much headspace – 1/4 inch is plenty.
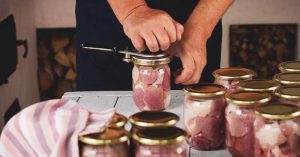
Put the lids and bands on the jars.
Dampen your clean cloth, and carefully wipe the rims of the jars. Don’t leave any drips, seeds, sugar, syrup, etc., on the rim. Don’t forget this step! Any residue on the rim will prevent the seal!
Now, take your handy dandy magnetic lid lifter (or a pair of tongs will work just as well) and center one lid on each jar – rubber side down. Take a metal screw band and carefully screw one on each jar. Finger tighten the screw band. Do not overtighten as overtightening can cause the rubber gasket to get crushed and the jar may not seal.
We’re almost done now! Time to process the jars.
If you have not already done so, place the canning rack into the water bath canning pot. Using your jar lifter, place your jars onto the rack in the water. Caution! Make sure you grab the jar below the screw band on the neck of the jar. Also, try to keep the jar upright. Tipping it could cause the food to leak out.
Check your water level – at least 2 inches above quart jars and 3 inches above pints. Add more hot water if needed.
Turn the heat onto its highest setting, put the lid on the pot, and heat the water to a vigorous boil.
Once boiling, set the timer for the amount of processing time as outlined in your recipe or specific direction for each food type.
If the water level drops during processing, add more boiling water. If the water stops boiling, bring it back up to a boil and restart the timer over again.
Once the jars have boiled for the recommended amount of time, turn off the burner and take off the canning pot lid. Using the jar lifter, carefully remove the jars out of the water bath canning pot. Place the hot jars on a towel or a wire rack to cool, leaving about an inch of space between the jars.
Leave the jars undisturbed for about 12 hours to cool. As the jars seal, you may hear the lid snap into place… clink! Don’t tighten the screw lid or try to push down the lid – leave them completely undisturbed.
Finishing up
Check out your beautiful jars! Once cooled, check the lid to ensure it’s sealed. The lid should be concave (curved downward). If you push on it with your finger, it should not pop up. If you find a jar that has not sealed, the food is not bad, just put it in your refrigerator and use it first. Or, you do have up to 24 hours to reprocess it again using the water bath canning method.
Remove the screw band on the jars that are sealed. You don’t really need it to store and sometimes, leaving it on, causes the band to rust and become difficult to remove. Wash any stickiness off the jars, dry them thoroughly and label them. It’s good to label the jars with the content, and the date. If you’ve canned several batches of the same type, it’s also good to note the lot number on the lid. That way, if you discover a jar that has spoiled, you could check the others in that lot to ensure that they are still ok.
Congratulations! You did it! Although it may seem a little daunting at first, water bath canning is fairly easy and straightforward. What will you water bath can next?
Try it, store it, gift it
If you are so inclined, open up a jar and give it a taste. How did it turn out? Awesome, I’ll bet!
For more information on water bath canning check out this link.