 Here are some guidelines to help you with proper handling of the goods. Always remember that the breed of the animal, its feeds and the way it was handled before and after it was killed determines the taste and the grain of the meat.
Check all the canning equipments make sure they are functioning well and wash them properly with hot soapy water and rinse them thoroughly. Make sure that everything is clean especially the hard to clean areas of the utensils and equipments. Inspect the jars and see to it that it is clean all over, place them in hot water until they are ready for use.
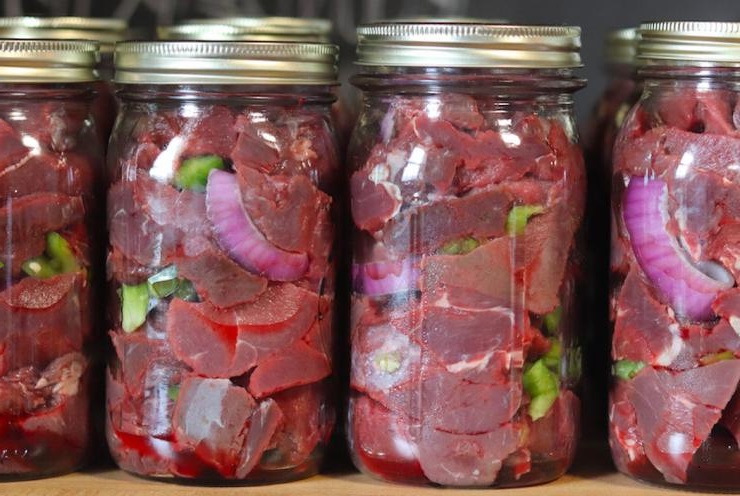
In preparing the meat, make sure that all gristle, bruised parts and the fat is trimmed away. Cut slabs of meat about an inch thick or appropriate for the jar sizes to be used. Determine carefully the amount of food for one canner load, and remember, one load at a time. Air bubbles should be removed by a wooden spoon or a plastic paddle. Do not use metal utensils like knives since they may nick the jars and it might break.
In sealing the jars, remove particles of food on top of the jars by wiping it with a clean cloth. When placing the caps, check the manufacturer’s direction since they vary depending on the type of jar being used. Make sure that it is properly sealed.
Process the food immediately to prevent contamination by microorganisms. Allow a cooling period of 10 minutes before removing the jars from the canner to avoid glass breakage.
When the jars are ready to be taken off the canner, set them a few inches apart to allow cooling. If thoroughly cooled, check if it is properly sealed by tipping the jar. If it is properly sealed, properly label the jars and put the date when it was canned and also place the expiration date. This information is very important. After labeling, place the jars in a place where it is not prone to breakage.