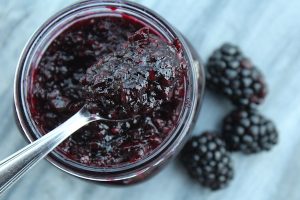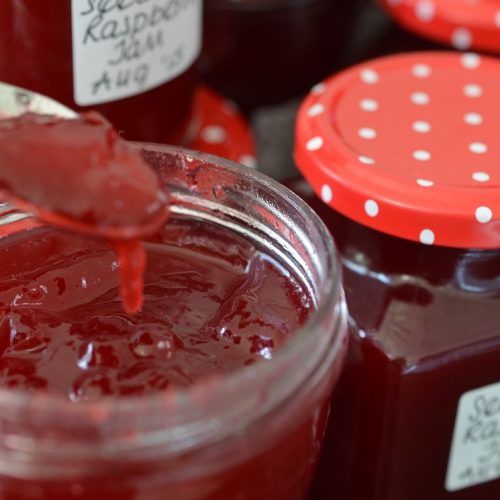
Seedless Raspberry Jelly
Seedless Raspberry Jelly Recipe
Ingredients
- 6 pints fresh or frozen raspberries (will yield approximately 7 1/2 cups of juice)
- 1/4 cup fresh lemon juice
- 8 1/2 cups sugar
- 1 pouch of Certo liquid fruit pectin
Instructions
- First you will need to smash your berries and extract all the juice that you can from them. It is recommended to put the berries in a pan on low heat until berries are hot. Then pour them into the cloth-lined bowl, draw edges of cloth together and tie tightly with sturdy string.Tie a loop in the end of the string and hang this cloth bag on the hook under your cabinet, with the large liquid measuring cup under it. Be sure the bag is hanging high enough so it won’t dip into the juice in the measuring cup, and low enough so it doesn’t allow drops to spatter your walls. When it finishes dripping (about an hour), carefully take it down and place on a dish. Rinse the cloth, then wash it well to use again. I put the berries in my Vitamix blender and blended until they were liquefied. Then I placed a sieve on my large liquid measuring cup and poured the berry juice in the sieve and slowly worked it through with a large metal spoon. Once you have 7 1/2 cups of juice you are ready to move to the next step. Measure the sugar and set it aside in a bowl to be used later.
- Fill your canning pot 2/3 full with water and put in on the stove on high heat, keeping the cover on. In another big pot place several clean jars and lids and fill with water. Place this pot on the stove and boil on med-high heat.
- Pour the raspberry juice into a large pot. I would suggest a 10 to 12 quart stock pot or larger if you have it. It seems extreme but trust me you will need the space. Add the lemon juice and fruit pectin. Cook on high heat, stirring constantly with a silicone spatula. About 10 minutes. When it starts to boil rapidly, let it boil for a minute.
- Then add 8 1/2 cups of sugar all at once. Continue to stir the mixture. The sugar will dissolve and it will be about another 10 minutes of stirring before it starts to boil again. During this phase the jam will “grow” in the pot and use up some of that extra space that you have. Keep stirring until 90% or more of the surface of the jam is made of small boiling bubbles. At this point when it is boiling rapidly again, let it boil for a minute then remove from heat. Turn the heat on your canning pot down at this point so the water is not boiling rapidly when you go to put your filled jars in.
- Working quickly, take the pot of boiling jars and begin removing one jar at a time with jar lifter. Wipe the inside of the jar dry. Fill jar with jam using ladle, leaving a 1/4 inch of headspace. After the jar is filled, wipe the rim clean with a damp cloth and retrieve a hot lid from the pot. Wipe the the lid dry, place it on the jar and tighten a clean ring on it. Once you have enough jars filled to fill your canning pot (mine can hold 12 regular mouth 1/2 pint jars and 8 wide mouth 1/2 pint jars) begin placing them in one at a time using jar lifter. For boiling water method, do not double stack jars. Make sure that water covers the tops of the jars by at least 2 inches. Cover the canning pot with lid and return to boil. When it starts boiling, then you can set your timer and boil for 10 minutes. After 10 minutes, use your jar lifter and carefully remove and set on a wire cooling rack. You should hear the lids pop as they seal as they gradually cool down.
- Once they are cool enough to handle remove the rings to prevent rusting. Leave the jars to cool over night and to finish setting. It can take them 12 to 24 hours to fully set. In the morning double check to make sure each of your jars sealed properly. You can do this by pressing on the center of the lid. If the lid gives and pops back the jar is not sealed. If the lid does not give but stays firmly in place then the jar is sealed. When the jars are completely cool, then the jam in the jars should be set and you can store them in a cool dry place for up to a year.
- If you have left over jam that doesn’t fill a jar you can place it in a jar or other contain and refrigerate and eat the next day.